Pour-over coffee is more than a method — it’s a ritual that transforms a simple cup of coffee into an experience. Loved by coffee enthusiasts worldwide, the pour-over technique offers precise control over brewing and results in a clean, nuanced cup that highlights the unique flavors of the beans. In this guide, you’ll learn how to make the perfect pour-over coffee at home, step by step, even if you’re a complete beginner.
What Is Pour-Over Coffee?
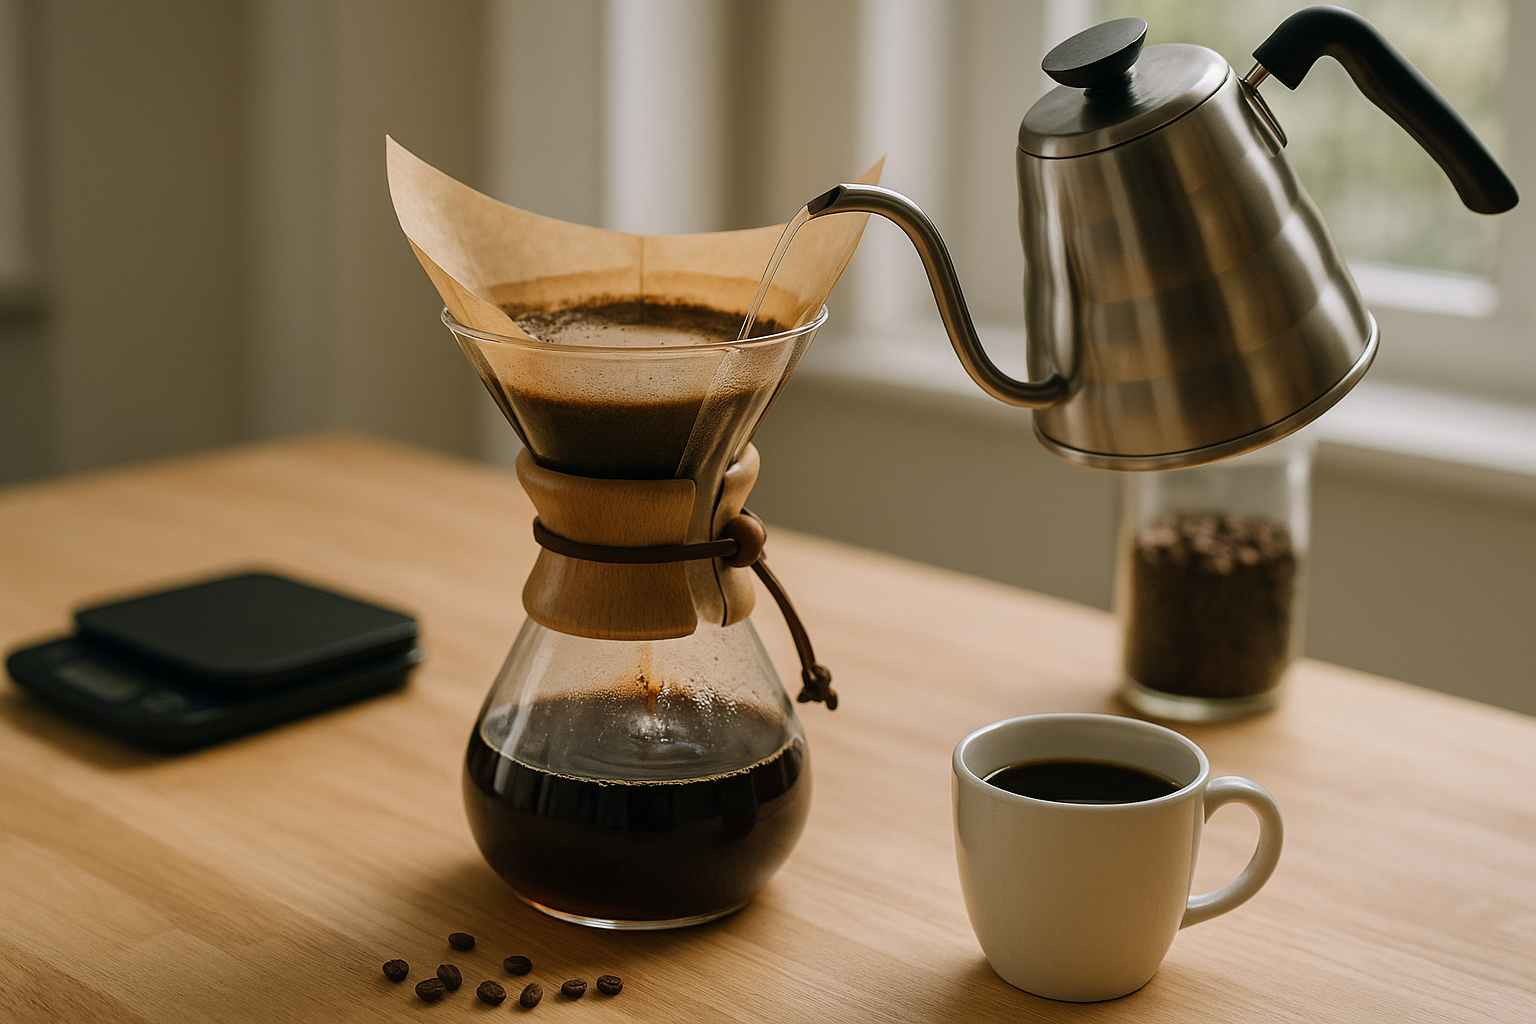
Pour-over coffee is a manual brewing method where hot water is poured over ground coffee in a filter, which then drips into a cup or carafe below. Unlike automatic coffee machines, pour-over allows you to control every variable — water temperature, pouring speed, grind size, and bloom time — making it a favorite among specialty coffee lovers.
Common devices used include the Hario V60, Chemex, and Kalita Wave. Each has its nuances, but the basic principles remain the same.
Why Choose Pour-Over Coffee?
Before diving into the how-to, it’s important to understand why this method stands out:
- Flavor clarity: Pour-over preserves the delicate notes of specialty beans.
- Consistency: With the right technique, you get the same result every time.
- Customization: You control strength, temperature, and extraction time.
- Simplicity: It requires no electricity and minimal equipment.
Now, let’s break down the process of crafting the perfect pour-over.
What You’ll Need
Here’s a checklist of what you need for making pour-over coffee at home:
- Pour-over brewer (like Hario V60, Chemex, or Kalita Wave)
- Paper filter compatible with your brewer
- Freshly roasted coffee beans
- Burr grinder (for a consistent grind)
- Gooseneck kettle (for controlled pouring)
- Digital scale (for precision)
- Timer
- Thermometer (optional but useful)
- Filtered water
- Mug or carafe
With your tools ready, it’s time to move on to technique.
Step-by-Step: How to Brew Pour-Over Coffee
Step 1: Heat the Water
Bring your filtered water to 195°F to 205°F (90°C to 96°C). If you don’t have a thermometer, let the water boil and then rest for 30 seconds. This temperature range is ideal to extract flavor without bitterness.
You’ll need about 15-17 grams of coffee per 250 ml (about 8 oz) of water. A typical recipe for one cup:
- 15g coffee
- 250g water
Adjust this based on your preference for stronger or lighter coffee.
Step 2: Grind the Coffee Beans
Grind your coffee to a medium-fine consistency — similar to table salt. A burr grinder is highly recommended for even particle size, which ensures consistent extraction.
Always grind right before brewing to preserve aroma and freshness.
Step 3: Rinse the Filter
Place the filter into your brewer and rinse it with hot water. This removes any papery taste and preheats your vessel. Discard the rinse water before proceeding.
Step 4: Add the Coffee Grounds
Place your brewer and mug or carafe on the scale and add the ground coffee. Level the bed for even extraction. Tare the scale to zero.
Step 5: Bloom the Coffee
Start your timer. Pour about 2 to 3 times the weight of the coffee in water (e.g., 30-45g for 15g of coffee) to saturate all the grounds. Let it bloom for 30 to 45 seconds.
Blooming allows trapped gases, especially carbon dioxide, to escape — essential for even extraction.
Step 6: Begin the Pour
After blooming, begin pouring in a slow, circular motion, starting from the center and moving outward. Avoid pouring on the filter.
Pour in stages, allowing the water to drain a bit between each pour. Aim for a total brew time of 2:30 to 3:30 minutes.
Step 7: Let It Finish
Once the water has passed through the grounds, remove the brewer, give your cup a gentle swirl, and enjoy.
Tips for Better Pour-Over Coffee
1. Use Fresh, High-Quality Beans
Look for freshly roasted beans with a roast date on the bag. Beans older than 2-4 weeks may taste stale.
2. Filtered Water Matters
Coffee is 98% water — using filtered or spring water enhances clarity and flavor.
3. Control Your Pour
A gooseneck kettle allows you to pour slowly and evenly, which affects the quality of extraction.
4. Maintain Clean Equipment
Clean your brewer, kettle, and grinder regularly to prevent oils and residues from affecting flavor.
5. Take Notes
Every coffee is different. Track your grind size, ratios, and brew times to refine your method over time.
Common Mistakes to Avoid
- Too coarse or too fine grind: This can lead to under- or over-extraction.
- Using boiling water: It can scald the coffee and create bitterness.
- Pouring too fast or unevenly: This causes inconsistent extraction and poor flavor.
- Ignoring the bloom: Skipping the bloom results in trapped gases and sour notes.
Experimenting With Variables
Once you’re comfortable with the basics, experiment with:
- Grind size (finer for slower brews, coarser for faster)
- Water temperature (lower for sweeter flavors, hotter for stronger ones)
- Brew ratio (adjust coffee-to-water ratio based on strength preference)
Pour-over coffee is part science, part art — and the best part is discovering what works for your taste.
Creating a Ritual
Making pour-over coffee is more than just brewing — it’s creating a mindful morning routine. The slow pour, the rising aroma, the quiet focus… it turns a simple drink into a small daily ceremony.
Light a candle. Put on some music. Brew your coffee. Start your day with intention.
Final Thoughts: Mastering the Pour-Over at Home
With a bit of practice, anyone can master the pour-over method. It’s affordable, enjoyable, and reveals flavors you might miss with other brewing methods. Whether you’re exploring the world of specialty coffee or just want a better morning cup, pour-over offers clarity, control, and connection to the process.
So go ahead — choose your beans, heat the water, and make your next cup of coffee something truly special.